
Off-Road Guides: How to Plug a Tire
By: Brendan Soriano / April 18, 2023 in Guides
With such a focus on aftermarket upgrades like lift kits, off-road lighting, rugged wheels, and oversized tires, it’s easy to lose sight of the basics. Vital off-road skills like trail repairs get lost in all the exciting upgrades and mods, but those shiny new parts won't help when you wind up with a nail or screw in your tire!
While, ideally, every wheeler should keep a full-size spare onboard, that’s not always the case. We’ve all taken an unexpected detour down a fire road or an eye-catching trail; however, these adventures are those most likely to leave you stranded with a leaky tire. For this reason, it’s vital to keep a tire repair kit in your gear bag and know how to use it!
If you’ve never patched a leaky tire, no sweat! The experts at RealTruck are here to guide you through each step of the process. In this guide, we cover tire plug kits, their assorted components, and how to use them!
What’s Included in a Tire Plug Kit?
While there are several brands of tire plug kits on the market, they all contain the same essential components to get the job done. These include:
Tire Plugs: Nylon or leather cords coated in a tacky, unvulcanized rubber compound; the pieces that actually plug the holes!
Rubber Cement: While not included in every kit, small tubes of rubber cement are often used to lubricate the tire plug during installation and encourage adhesion.
T-Handle Reamer Tool: A rounded, file-like tool used to remove loose rubber and prepare the punctured hole for plugging.
T-Handle Plug Installation Tool: Specially-designed tool that's used to grip the plug and insert it into the tire.
Besides these items, we’d recommend keeping a pair of flush-cut pliers or a razor blade on hand to trim the excess plug once inserted.
How to Plug a Tire (Step-by-Step)
Now that we’ve covered the components of a tire plug kit and what each is used for, it’s time for a repair!
Step 1: Assess the Damage
Before getting started, we’ll need to inspect the damage to see if the tire is repairable. Consider variables such as the hole size, whether a foreign object is still lodged inside, and where the tire is punctured. As a general rule of thumb, a tire is repairable if:
The hole is under ¼-inch or 6 mm in diameter
The hole is within the crown of the tire (the inner tread beginning 1.5–2-inches in from the inner and outer sidewalls)
The puncture does NOT overlap existing repairs
Note: Damage to a tire’s sidewall cannot be repaired.
If the damaged area fits the above-outlined criteria, you can continue to the next step!
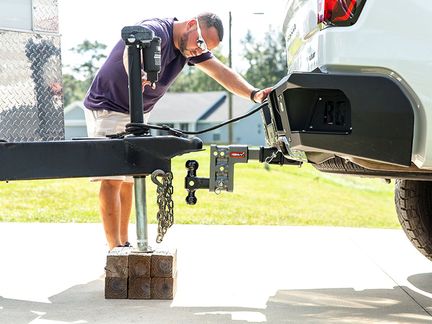
Step 2: Elevate Your Vehicle and Remove the Tire
Now, we’re aware that this step may not be possible in all conditions. In an emergency scenario, such as being on the trail without access to a jack, then you may be able to forgo this step.
If possible, however, jack up the vehicle and remove the tire before beginning the repair. Removing the tire will help to slow the leak, provide better access to the repair area, and allow you to insert the tools with minimal effort.
Step 3: Remove the Object
If the foreign object is still embedded in the tire, now is the time to remove it. You can often unscrew screws, lag bolts, and other threaded hardware from the tread; however, nails and other non-threaded objects will likely require a flathead screwdriver or long-nose pliers.
Tip: If possible, prep the tire plug kit before removing the foreign object from the tread to reduce air loss.
Step 4: Prep the Hole
Upon inspecting the hole left behind by the object, you’ll likely notice some jagged edges or loose rubber; the hole may also be too narrow to fit the tire plug and tool. To prepare the hole, you'll need to grab the T-handle reamer tool from your tire plug kit. Line the tip of the reamer up with the hole in the tire and press firmly to insert it, then work the tool up and down while rotating until the hole is approximately as wide as the tool and uniform. This step also roughens up the tire carcass, promoting adhesion.
Step 5: Insert Plug Into Tool
At this point, locate the tire plugs and the insertion tool, ensuring the plugs are still pliable and tacky; if not, they’re likely old and unusable.
If fresh and tacky, thread the tip of the plug through the hole at the tip of the insertion tool, just as you would a string through a sewing needle. Pull the plug until an even amount protrudes from either side.
Step 6: Apply Rubber Cement
If your tire plug kit includes rubber cement, now is the time to use it! Open the tube and apply the compound directly into the tire plug, coating liberally. Once cured, the rubber cement helps to hold the plug in position.
Step 7: Plug the Tire
With the plug inserted into the installation tool and coated in rubber cement, line up the tool and plug with the hole. Press down firmly until only approximately an inch of the plug is exposed.
Step 8: Remove the Tool
The tool’s eyelet features a specially-designed slit at its base, allowing you to remove the tool without shifting the plug. After ensuring the tool is perfectly straight, yank it out of the tire in a single, swift motion; this should allow you to remove it without disturbing the plug or inducing a leak.
Step 9: Remove Excess Plug and Cement
After allowing the plug and cement to cure for approximately 5–10 minutes, trim the excess with flush-cut pliers or a razor blade, leaving approximately ⅛-inch remaining. Wipe off any remaining rubber cement with a shop rag or paper towel.
Step 10: Refill Tire and Check for Leaks
With the repairs completed, it’s time to refill the tire and inspect for leaks! While soapy water is best, any liquid should suffice to apply over the repaired area. Inspect for bubbles; if none are present, the repair is successful!
Is a Plug a Permanent Fix?
There’s ongoing debate regarding whether a plug is a permanent or temporary fix. While tire plugs are known to last for thousands of miles without failure, we’d recommend viewing them as semi-permanent. While appropriate as a short-term fix, it’s best to have the damaged tire professionally patched by a reputable tire shop when convenient.
Shop Now
Realtruck is your home for the best products to outfit your build for unforgettable adventures.
Off-Roading | Wheels | Tires
See More Guide Articles Here...


- …
Join over 2 million RealTruck people
Get exclusive savings, insider information, and the latest RealTruck articles sent straight to your inbox.